What you'll learn:
- Create a blank environment to build lighting from scratch
- The 4 light types and when to use each
- How shadow softness works (the one principle that explains it all)
Section 7: Blank Environment (7 min)
A blank level removes all assumptions. No default lighting, no sky, no post-processing. This lets us:
- See exactly what each component contributes
- Understand why things look "wrong" when elements are missing
- Build up lighting systematically
- File → New Level → Empty Level
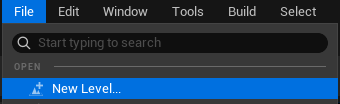 File menu - New Level
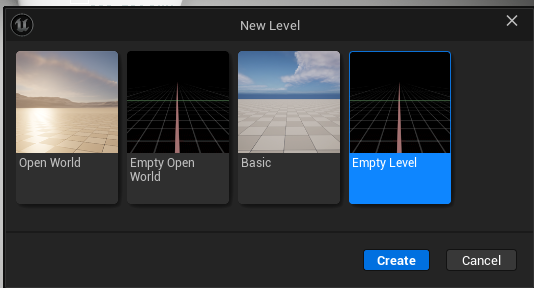 New Level dialog - Empty Level selected
- Result: Complete darkness (no lights exist)
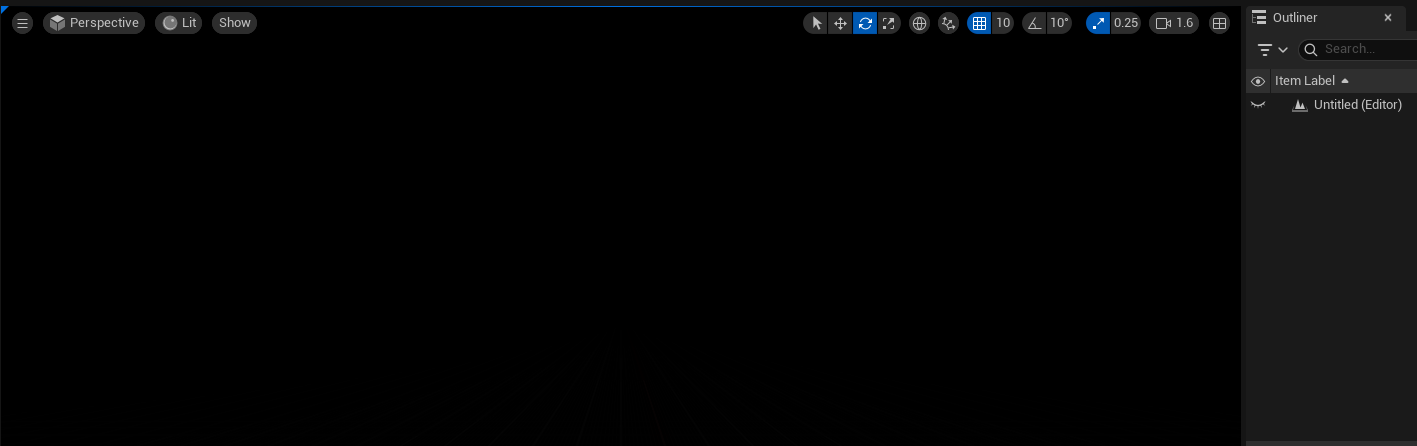 Empty Level - Complete Darkness
To add anything to your scene:
Window → Place Actors (or press Shift+1)
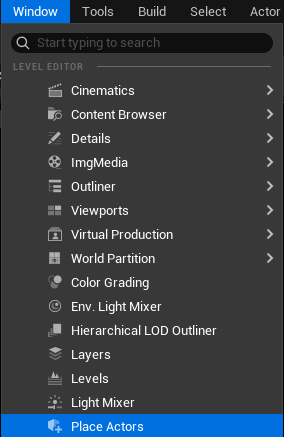 Window menu - Place Actors
 Place Actors panel - Shapes
This opens the Place Actors panel where you can find:
- Basic shapes (cube, sphere, cylinder, etc.)
- Lights (point, spot, rect, directional)
- Volumes (post process, etc.)
- And more
Create a floor:
- Place Actors → Shapes → Cube
- Scale it: X = 10, Y = 10, Z = 0.1 (flat platform)
- Position at Z = 0
Add test objects:
- Place Actors → Shapes → Cube
- Position it on the floor
- Place Actors → Shapes → Cylinder
- Position next to the cube
Now you have a simple scene to light.
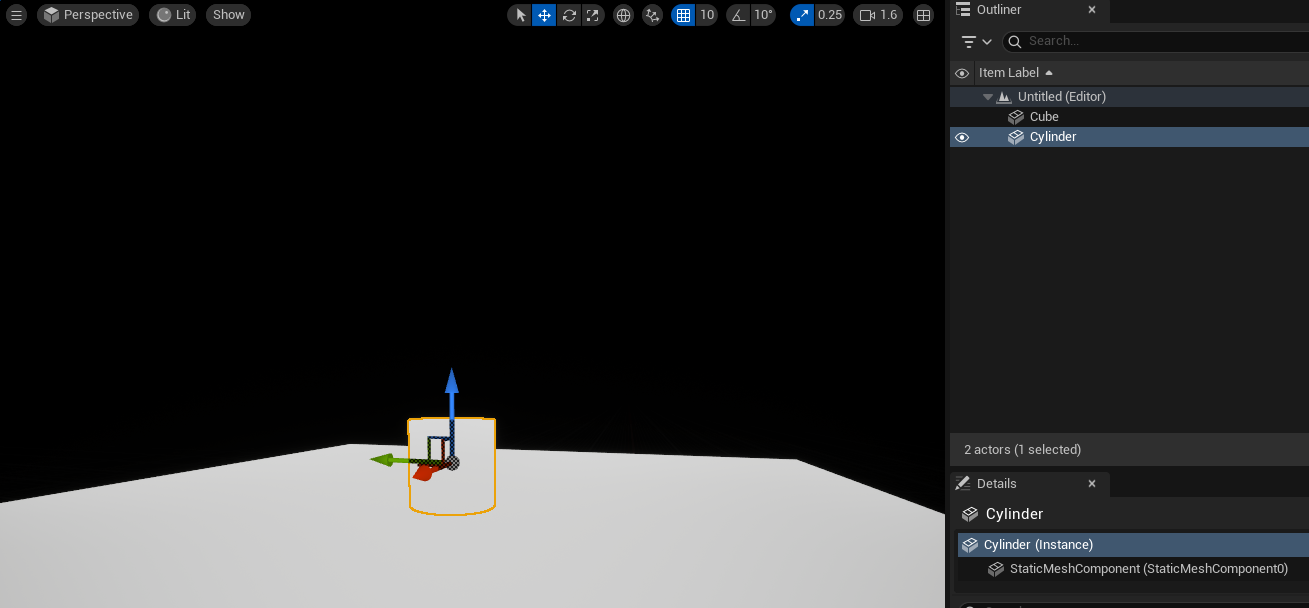 Test Geometry Setup - Cube and Cylinder on floor
Tip: If you need to see your scene, switch the viewport from Lit to Unlit (Viewport > View Mode > Unlit, or press Alt+3). This shows objects without lighting so you can position them. Switch back to Lit mode (Alt+4) once you add lights.
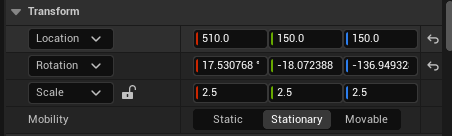
Every mesh in Unreal has a Mobility setting that controls whether it can move and how the engine optimizes it:
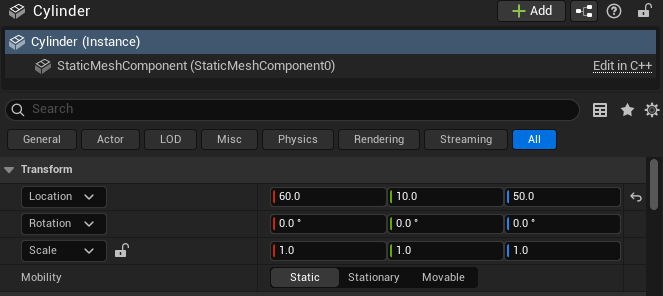 Details panel showing Mobility setting
 Mobility options - Static, Stationary, Movable
| Mobility | Can Move? | Performance Benefit |
|---|---|---|
| Static | No | Lowest transform overhead, shadow depth caching |
| Stationary | No | Shadow map caching for better dynamic shadow performance |
| Moveable | Yes | Required for anything that moves at runtime |
For this course, we're using fully dynamic lighting (Lumen), not baked lightmaps.
Window → World Settings (or click the Settings dropdown in the toolbar)
| Setting | Value | Why |
|---|---|---|
| Force No Precomputed Lighting | ✓ On | Disables lightmap baking — all lighting is real-time |
 Window menu - World Settings
In the World Settings panel, find the Lightmass section → Lightmass Settings → Advanced:
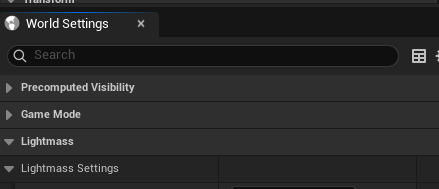 World Settings panel
The setting is located in Advanced Lightmass:
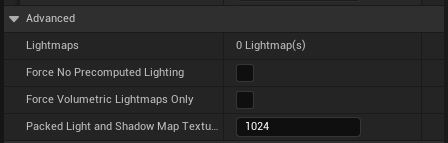 Force No Precomputed Lighting setting
When you enable this setting, you'll see a confirmation dialog asking you to rebuild lighting:
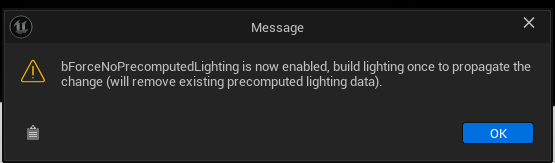 Force No Precomputed Lighting warning
Click OK. The setting is now enabled:
 Setting enabled
Why dynamic lighting for this course? Baked lighting (lightmaps) is a separate workflow optimized for static scenes and lower-end hardware. This course focuses on fully dynamic lighting because:
- Instant feedback — change a light, see the result immediately
- No waiting — no "building lighting" step that can take minutes or hours
- Better for learning — experiment freely, make mistakes, iterate quickly
- Modern workflow — Lumen and VSM are built for dynamic lighting
The trade-off: fully dynamic lighting requires more GPU power and may have temporal noise. But for learning lighting fundamentals, the instant feedback loop is invaluable.
With Force No Precomputed Lighting enabled, all meshes receive fully dynamic lighting. However, the Mobility setting still matters for performance:
| Mobility | Use Case | Performance Benefit |
|---|---|---|
| Static | Floors, walls, props that don't move | Lowest transform overhead, shadow depth caching |
| Stationary | Lights/objects that won't move but need dynamic shadows | Shadow map caching, cheaper than Moveable |
| Moveable | Objects that move during gameplay | Required for runtime transforms |
Without any lights, your scene is completely black. This is intentional — Unreal doesn't fake ambient lighting. If there's no light source, there's no light. This physically correct behavior helps you understand exactly what each light contributes.
After enabling Force No Precomputed Lighting, build the level to apply the change:
Why rebuild and save? Building and saving ensures any existing baked lighting data is cleared from the level. Without this step, old lightmaps could remain associated with the level and cause unexpected lighting behavior.
Build → Build All Levels
 Build menu
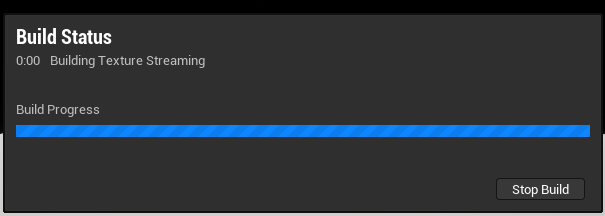 Build progress
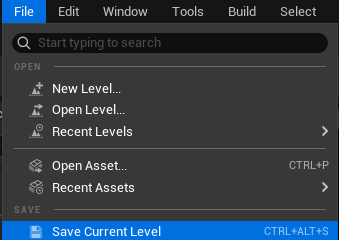
Save your level to preserve the work:
File → Save Current Level (Ctrl+Alt+S)
 File - Save Current Level
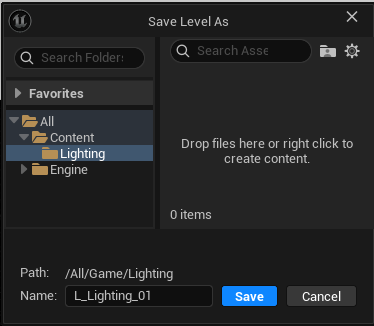 Save Level As dialog
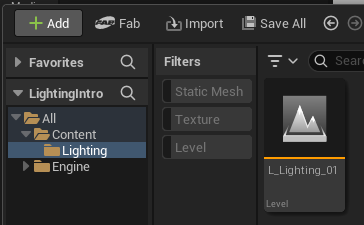 Content Browser with saved level
To save all modified assets:
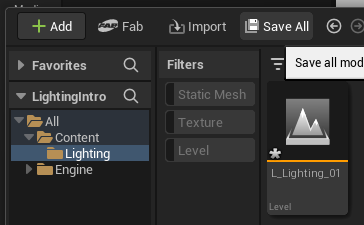 Save All button
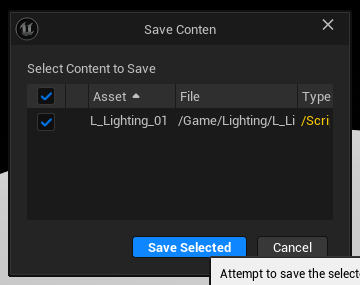 Save Content dialog
Section 8: Light Types & Properties (18 min)
You can find all light types in the Place Actors panel under Lights:
 Light Types Toolbar
Spot Light
- Directional cone-shaped emission
- Inner/outer cone angles control falloff
- Good for: Stage lights, flashlights, focused fixtures, car headlights
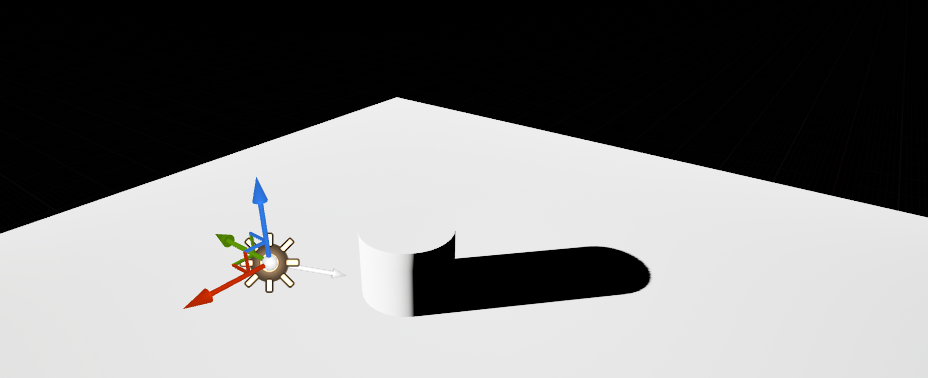
 Spot Light Example
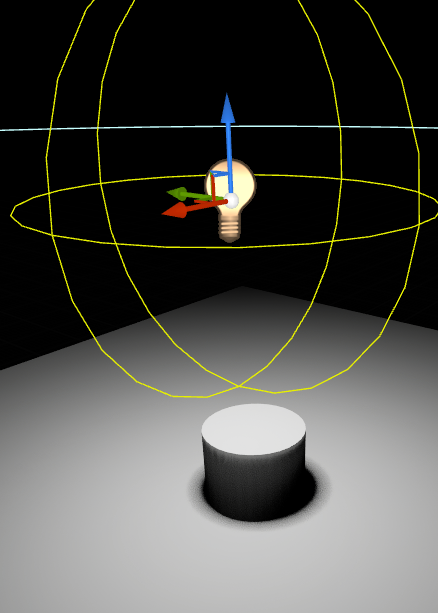
Point Light
- Emits equally in all directions from a point
- Like a bare light bulb
- Most expensive light type — internally calculated as 6 spot lights (one for each direction of a cube)
- Good for: Lamps, candles, small fixtures
 Point Light Example
Rect Light
- Emits from a rectangular surface
- Most accurate for panel lights, softboxes, LED panels
- Has Source Width/Height properties
- Expensive — calculates light contribution across the entire rectangular area, not a single point. More accurate area lighting = more computation.
- Good for: Studio lighting, product visualization, industrial panels
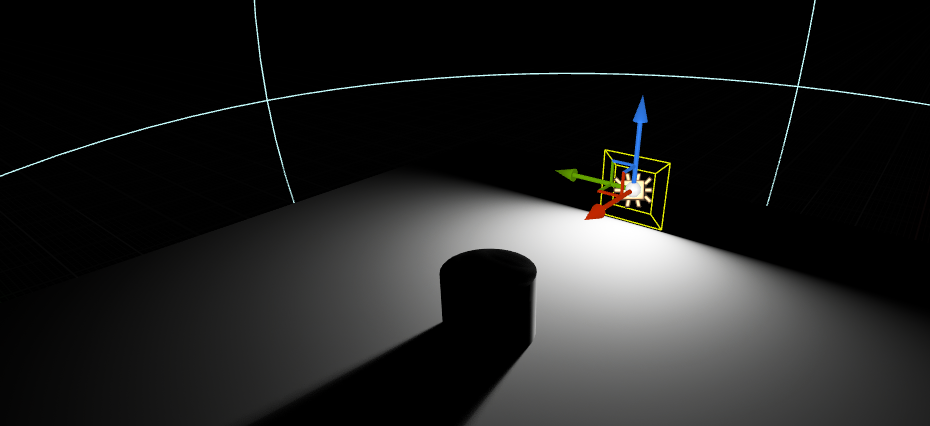 Rect Light Example
Directional Light
- Parallel rays from infinitely far away
- No falloff — same intensity everywhere
- Has Source Angle property (affects shadow softness)
- Typically only one in a scene — represents the sun. With advanced understanding, you can have multiple (e.g., sun and moon) but this requires careful setup.
- Intensity measured in Lux, not Lumens — because the sun is so large that Lumens would be an impractically small measurement
 Directional Light Example
Note: We'll cover light units and measurements in Part 15: Exposure.
Like meshes, lights also have a Mobility setting:
 Light Mobility Panel
 Light Mobility Setting
For lights, Mobility controls how they interact with baked vs dynamic lighting:
| Mobility | Normal Behavior | With Force No Precompute |
|---|---|---|
| Static | Fully baked into lightmaps | Behaves like Moveable (no bake) |
| Stationary | Baked indirect + real-time direct | Behaves like Moveable, but keeps some shadow caching optimizations |
| Moveable | Fully dynamic every frame | No change — already fully dynamic |
Performance: Static and Stationary lights normally offer significant performance savings through baked lightmaps and cached shadows. With Force No Precompute enabled, those baked benefits are eliminated — lighting calculations become fully dynamic for all lights. However, mobility still matters: Static lights have lower transform overhead (like Static meshes), and Stationary lights can still benefit from cached shadow maps.
Tip: For this course, we're using Moveable lights with Lumen for fully dynamic global illumination. This gives us real-time feedback as we learn.
Note: Baked lighting workflows and mobility optimization strategies are separate topics we won't cover here.
| Property | What It Does |
|---|---|
| Intensity | How bright the light is |
| Intensity Units | Unit system: Lumens, Candelas, Lux, or Unitless |
| Light Color | Tint of the light |
| Temperature | Color on Kelvin scale (2700K warm → 6500K cool) |
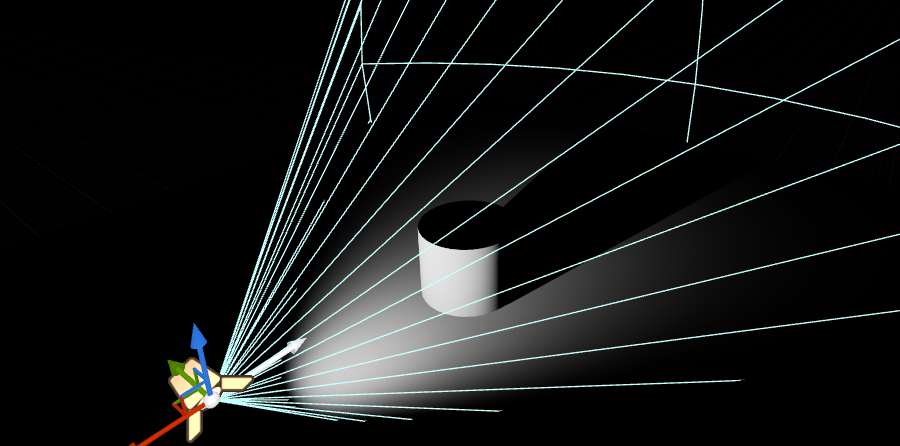
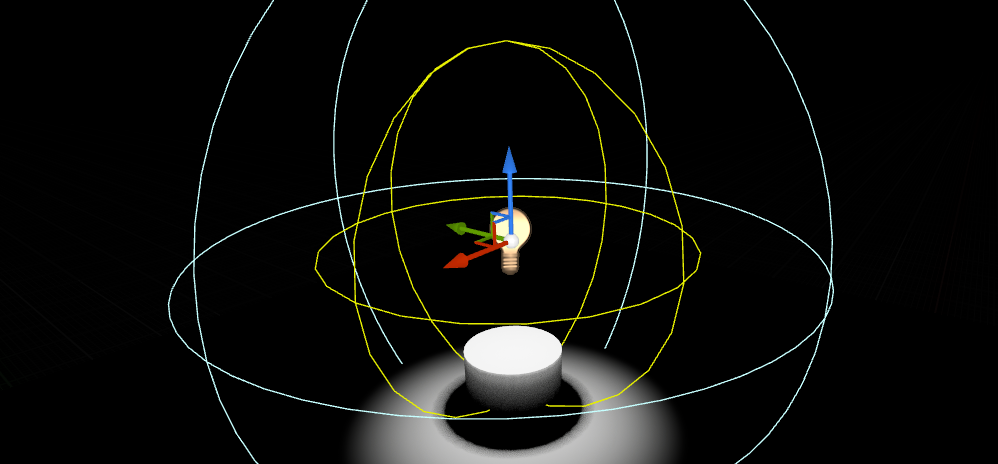
| Attenuation Radius | How far light reaches (Distance - White Lines) |
| Source Radius / Source Angle | Size of light source (affects shadow softness + specular highlight - Yellow Lines) |
| Source Length | Stretches the light into a tube/line shape (creates elongated specular highlights, useful for fluorescent tubes) |
| Cast Shadows | On or Off — whether this light casts shadows at all |
| Indirect Lighting Intensity | How much this light contributes to GI bounce |
| Volumetric Scattering Intensity | How visible this light is in fog/volumetrics |
| Spot Light | Point Light |
|---|---|
 Spot Light Settings Spot Light Settings | 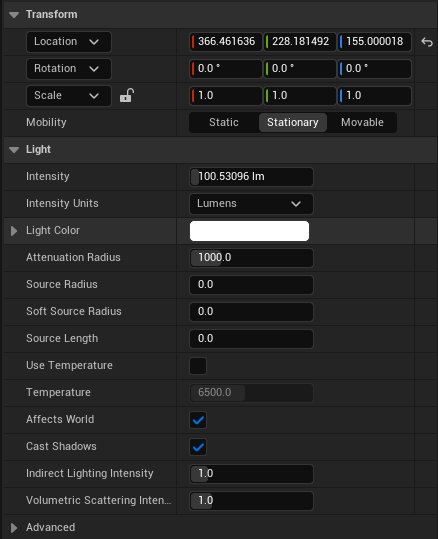 Point Light Settings Point Light Settings |
| Rect Light | Directional Light |
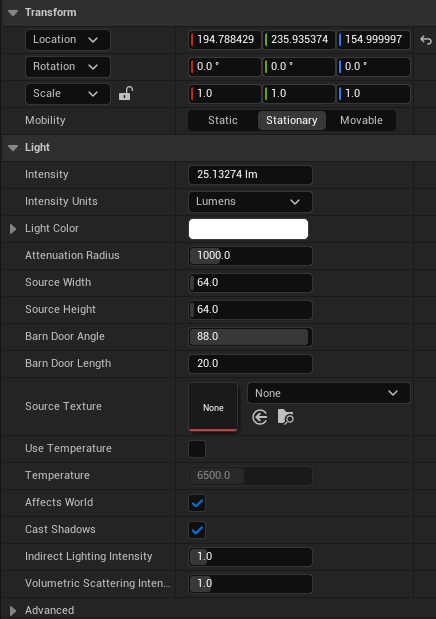 Rect Light Settings Rect Light Settings |  Directional Light Settings Directional Light Settings |
Unreal uses real-world photometric units. Local lights and Directional lights use different units:
Local Lights (Point, Spot, Rect):
| Unit | What It Measures | Example |
|---|---|---|
| Lumens (lm) | Total light output (all directions) | Interior light: 1,000 lm |
| Candelas (cd) | Intensity in one direction | Car headlight: 30,000 cd |
| Unitless | Arbitrary brightness value | Artistic control, legacy projects |
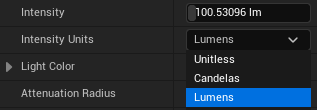 Intensity Units Dropdown
Directional Light (Sun/Moon):
| Unit | What It Measures | Example |
|---|---|---|
| Lux (lx) | Light arriving at a surface | Sun at noon: 100,000 lx |
 Lux Setting for Directional Light
Why Lux for Directional? The sun's total lumen output would be an impractically large number. Lux measures light landing on a surface — much more useful for sunlight.
Mental model:
- Lumens = how much total light leaves the bulb
- Candelas = how bright it is looking directly at the beam
- Lux = how much light lands on your desk
Why Use Lumens?
- Real-world reference — Look up any bulb's specs and use that value directly
- Consistent across light types — 1000 lm Point Light = 1000 lm Spot Light (same total output)
- Predictable exposure — Camera settings work correctly when lights use physical values
Note: We'll cover physical light values and exposure in detail in Part 15: Exposure.
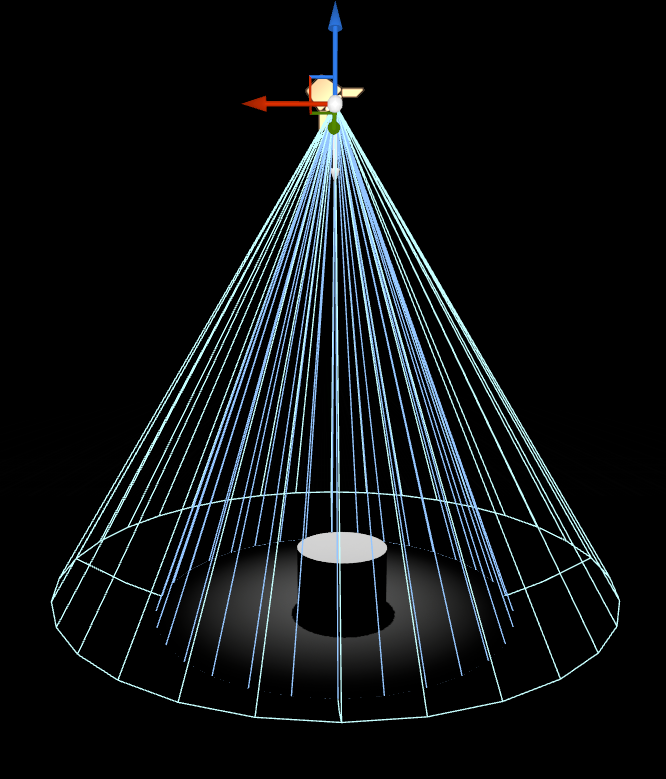
Attenuation controls how far a light's influence extends. All distances in Unreal are in centimeters (1 Unreal Unit = 1 cm).
 Attenuation Radius Setting
| Light Type | Attenuation Behavior |
|---|---|
| Spot | Attenuation Radius — Distance in cm, plus Inner/Outer Cone Angle for cone shape and falloff |
| Point | Attenuation Radius — Diameter in cm |
| Rect | Attenuation Radius — Diameter in cm |
| Directional | No attenuation — parallel rays from infinitely far away, affects entire scene |
| Spot Light | Point Light | Rect Light |
|---|---|---|
 Spot Light Attenuation Spot Light Attenuation | 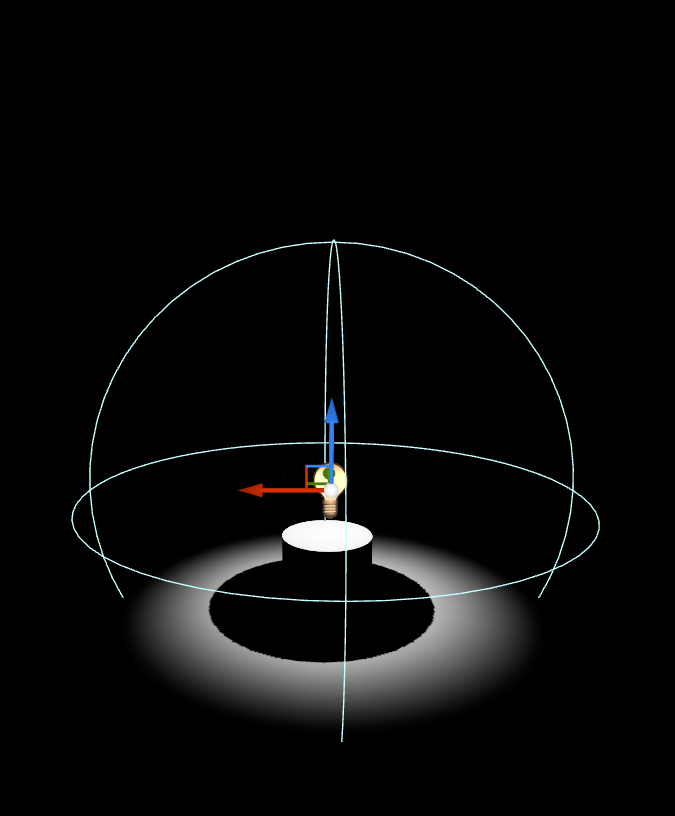 Point Light Attenuation Point Light Attenuation | 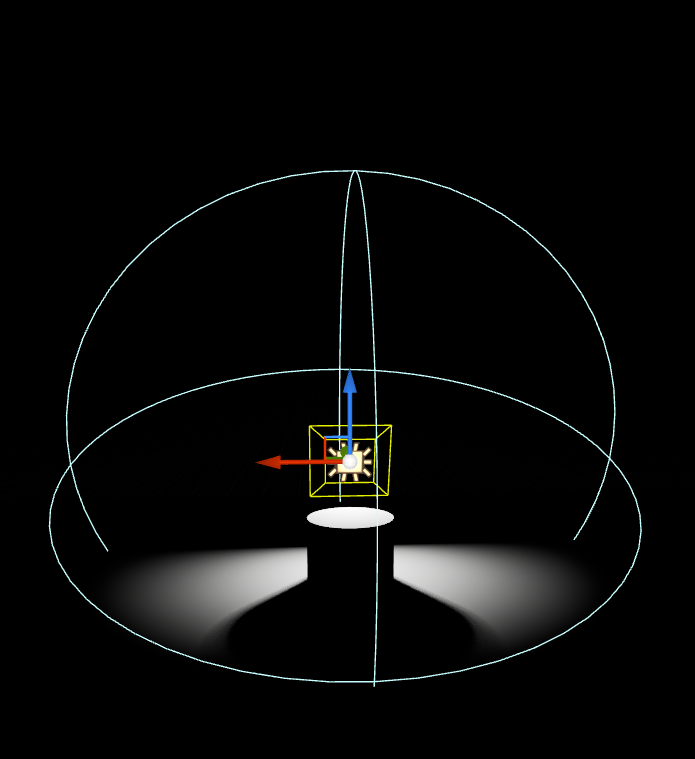 Rect Light Attenuation Rect Light Attenuation |
Tip: Attenuation Radius controls how far light travels. Source Radius/Angle controls shadow softness. These are independent — increasing one doesn't affect the other.
Section 9: Shadows — Soft vs Hard (10 min)
What Determines Shadow Softness?
The bigger the apparent size of the light source, the softer the shadow.
Shadow softness depends on the apparent size of the light source as seen from the subject — not its actual size.
A light source can be massive, but if it's far away, it appears small and creates hard shadows.
Apparent Size = Actual Size ÷ Distance
How Real-World Lights Work
The Sun — Hard Shadows
The sun is enormous (1.4 million km diameter), but it's 150 million km away. From Earth, it only spans about 0.5 degrees of the sky — a tiny dot.
Result: Sharp, hard-edged shadows on a clear day.
TODO: Add real-world sun hard shadow reference image
Overcast Sky — Soft Shadows
When clouds roll in, the sun's light scatters through the cloud layer. Now the entire sky becomes your light source — thousands of times larger in apparent size.
Result: Soft, diffused shadows (or nearly invisible shadows).
TODO: Add overcast soft shadow reference image
A Bare Bulb — Changes with Distance
Move a bare light bulb close to an object:
- Bulb appears large relative to subject
- Soft shadows
Move the same bulb far away:
- Bulb appears small (approaches a point)
- Hard shadows
This is the inverse of what you might expect — for a given source size, moving the light closer increases its apparent size relative to the subject, creating softer shadows.
The Photography Studio Approach
Photographers figured this out long ago:
| Technique | What It Does | Shadow Result |
|---|---|---|
| Large softbox close to subject | Maximizes apparent size | Very soft |
| Small softbox far from subject | Minimizes apparent size | Harder |
| Bare flash far away | Point source | Hard edge |
| Bounce off ceiling | Entire ceiling becomes source | Soft fill |
Your light box works the same way — it's a large diffuse panel placed close to the product, maximizing apparent size for soft, even illumination.
Now let's see how Unreal implements these concepts with specific controls per light type.
Source Radius / Source Angle
Unreal simulates shadow softness with different controls per light type:
For Point/Spot Lights: Source Radius
- Simulates the physical size of the bulb/fixture
- Larger radius = softer shadows
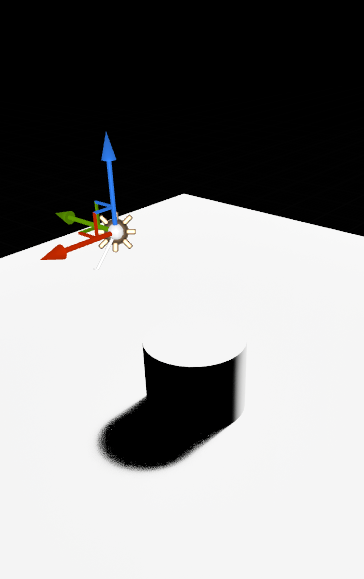
- 0 = infinitely small point = hard shadows
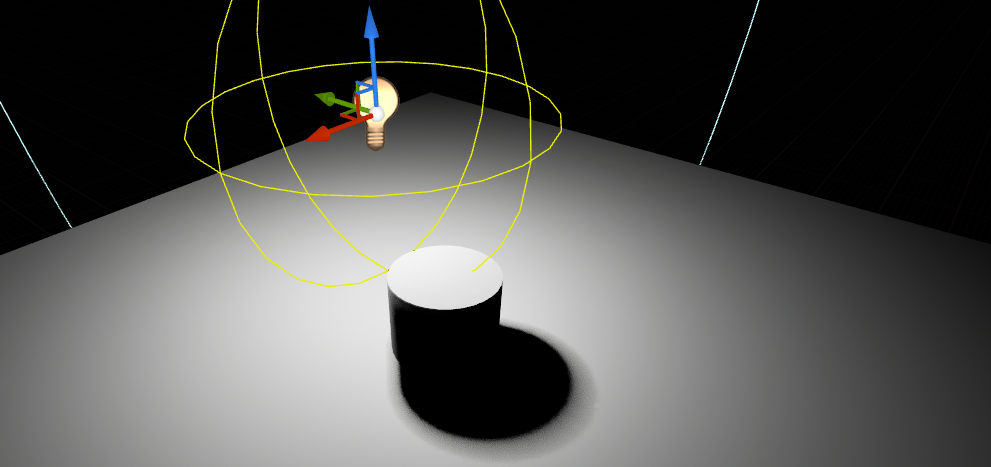
With Source Radius = 0, you get sharp, hard-edged shadows:
 Source Radius Zero
 Hard Shadow from Point Light
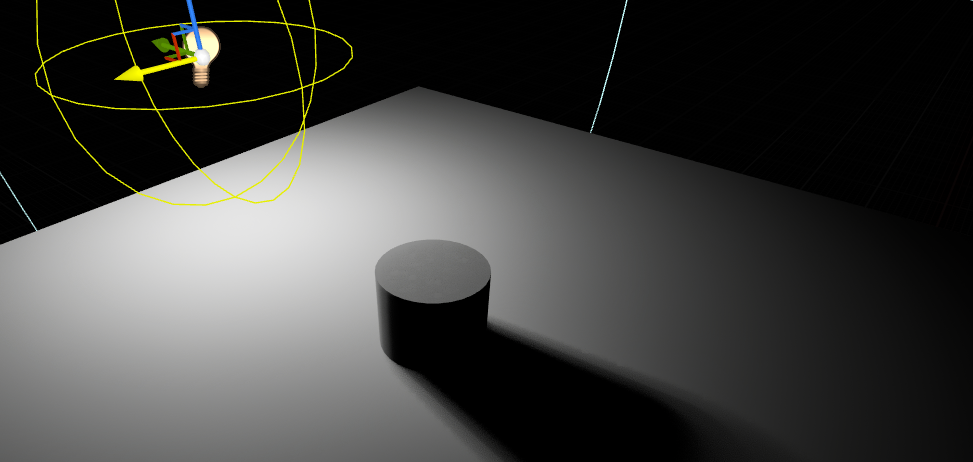
Increase the Source Radius to simulate a larger light source:
 Source Radius Large
 Soft Shadow from Point Light
Notice how the shadow edges become softer and more gradual — this is physically accurate to how real area lights behave.
For Directional Light: Source Angle
- Simulates the angular size of the sun disk
- 0.5° ≈ real sun on clear day (hard shadows)
- Larger values = overcast sky effect (soft shadows)
- 5°+ = heavily overcast, very soft
- Typically you don't need to change this — the default is physically accurate for sunlight
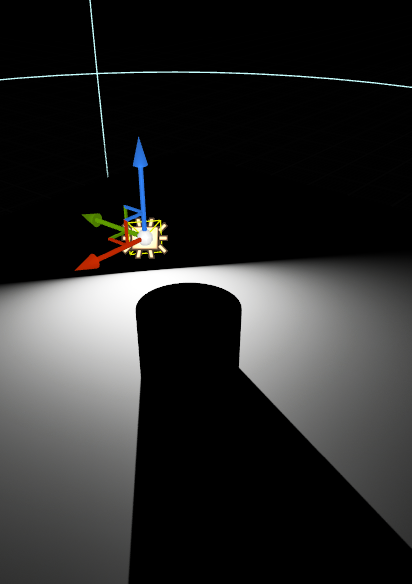
With a small Source Angle (like the real sun):
 Source Angle Small
Directional Hard Shadow
Increase the Source Angle to simulate overcast conditions:
 Source Angle Large
 Directional Soft Shadow
Note: Realistically, the sun rarely exceeds ~5° Source Angle. Setting the angle too high can introduce artifacts and noise in shadows. Achieving truly soft directional lighting (like heavy overcast) requires additional techniques we'll cover later.
For Rect Lights: Source Width/Height
- Physical dimensions of the light panel
- Larger panel = softer shadows
- Directly matches real softbox behavior
Small Source Width/Height values create harder shadows:
 Rect Light Dimensions Small
 Rect Light Hard Shadow
Larger dimensions create softer, more diffused shadows:
 Rect Light Dimensions Large
Rect Light Soft Shadow
Distance Still Matters
In Unreal, the Source Radius/Angle is the base softness. The actual shadow softness also depends on:
- Distance from light to object (affects apparent size)
- Distance from object to shadow-receiving surface (affects penumbra spread)
Light close to subject — larger apparent size, softer shadows:
 Point Light Close
Same light moved further away — smaller apparent size, harder shadows:
 Point Light Far
A Rect Light that looks soft up close will cast harder shadows on distant objects — just like reality.
Tip: This is why photographers use large softboxes positioned close to their subjects. The combination of large size + close distance maximizes shadow softness.
Key Points:
- Start with a blank level to understand what each component contributes
- Force No Precomputed Lighting enables fully dynamic lighting for instant feedback
- Mesh Mobility (Static/Stationary/Movable) affects performance even with dynamic lighting
- 4 light types: Spot, Point, Rect, Directional — each has its use case
- Point Lights are expensive — internally calculated as 6 spot lights
- Directional Light represents the sun — use Lux for intensity, typically only one per scene
- Light Mobility affects how lights interact with baked vs dynamic lighting
- Shadow softness = apparent size of light source — the one principle that explains it all
- Source Radius/Angle controls base softness; distance affects actual shadow appearance
- Attenuation Radius controls how far light reaches — independent of shadow softness
You now understand the fundamentals: light types, properties, and how shadow softness works. But we've been using default shadow settings. In Part 4: Direct Lighting Systems, we'll explore the different shadow rendering methods — Shadow Maps, VSM, Distance Fields, and Ray Tracing — and when to use each.